Set Up Geofencing For Location-Based Research
Last updated: November 18, 2026
Geofencing lets you require participants to visit a specific physical location before they start an interview. Use it for in-store research, shopalongs, or gathering feedback at a participating location.
What do you need before you start?
A supported study type: Your study needs to use text, voice, or video responses. Location setup isn’t supported for simulations, screen share, mobile app testing, mobile website testing, or voice-to-voice interviews.
Permissions: You need permission to edit the study.
A participant plan: Participants will need to travel to a selected location and allow location access on their device.
Add Interview Locations
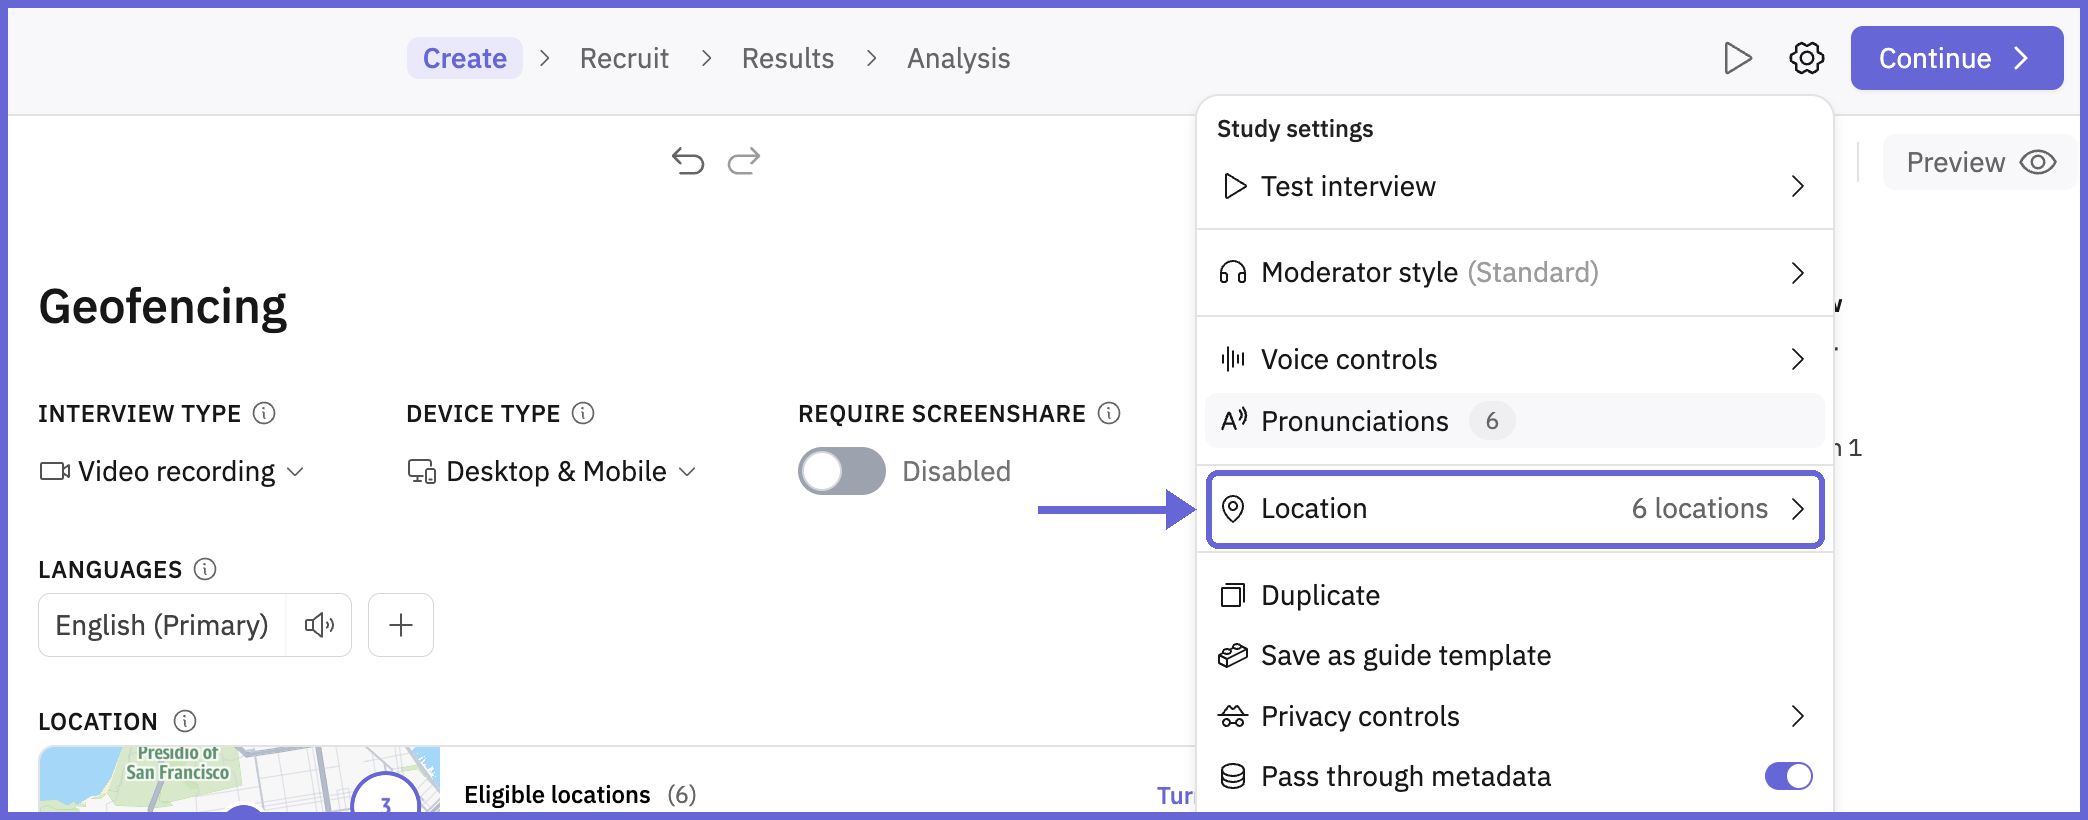
Open your study’s Create page, then select Study settings → Location. An un-configured study shows Anywhere.
In Interview location, search for a store name or address and select a result.
To find multiple branches, select the business’s multiple locations result. In Find locations, choose Map area, ZIP / postal codes, State or region, or Country.
Review the results and select the locations participants can visit. Use Select all or Deselect all to adjust the list. Postal-code results may already be selected. Click Add selected locations to return to the main location editor.
For example, search for Chipotle and use ZIP code 94105 to find participating branches in that area.
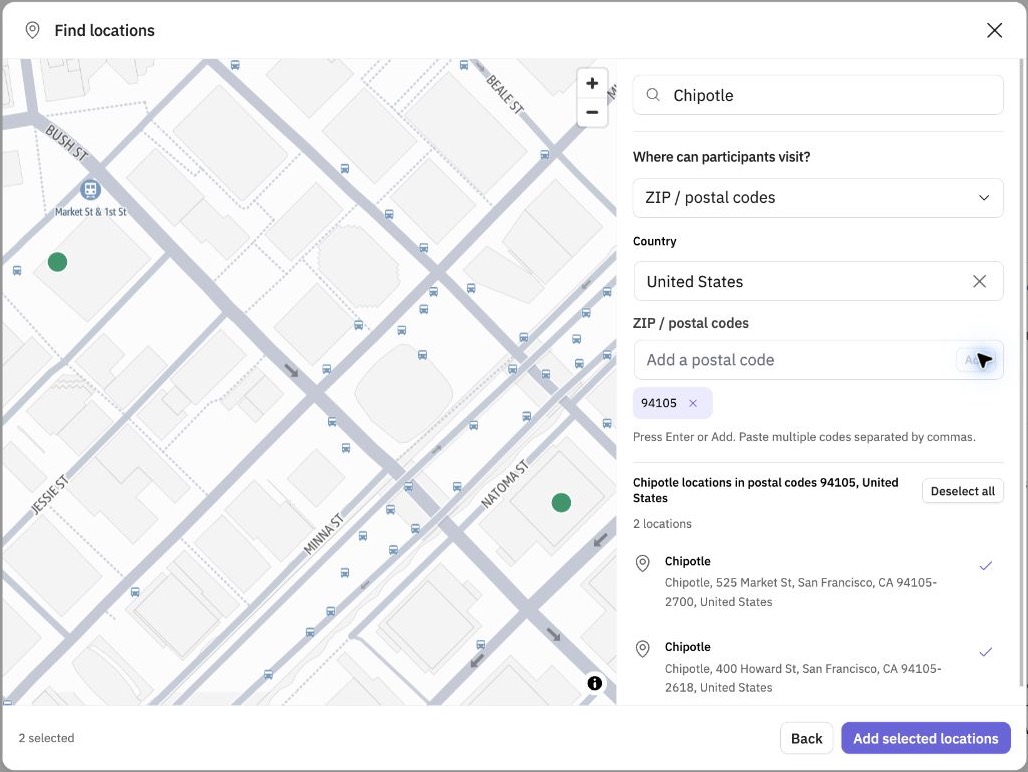
Moving the map doesn’t run a new search. Click Search this area to search within the visible map. Review the selected addresses before saving: your study uses the specific locations you save, and won’t automatically add future branches.
Import A Location List
If you already have a list of addresses, click Import CSV in the location editor. Use Download template or See expected format to prepare your file. You can upload up to 1,000 addresses in a CSV of up to 1 MiB.
Confirm the address column, review uncertain matches, and choose the correct location or skip the row. Add the reviewed locations to your selection, then save them in the main editor.
Add Guidance And Save
Review Participant guidance, which tells participants to visit a participating location and complete the study there.
Select Add extra instructions if you need to explain where to begin or what to do at the location.
Click Save changes. Wait for Saving locations… to finish, then check the Eligible locations count in your study overview. If a save needs attention, use Review save to resolve it.
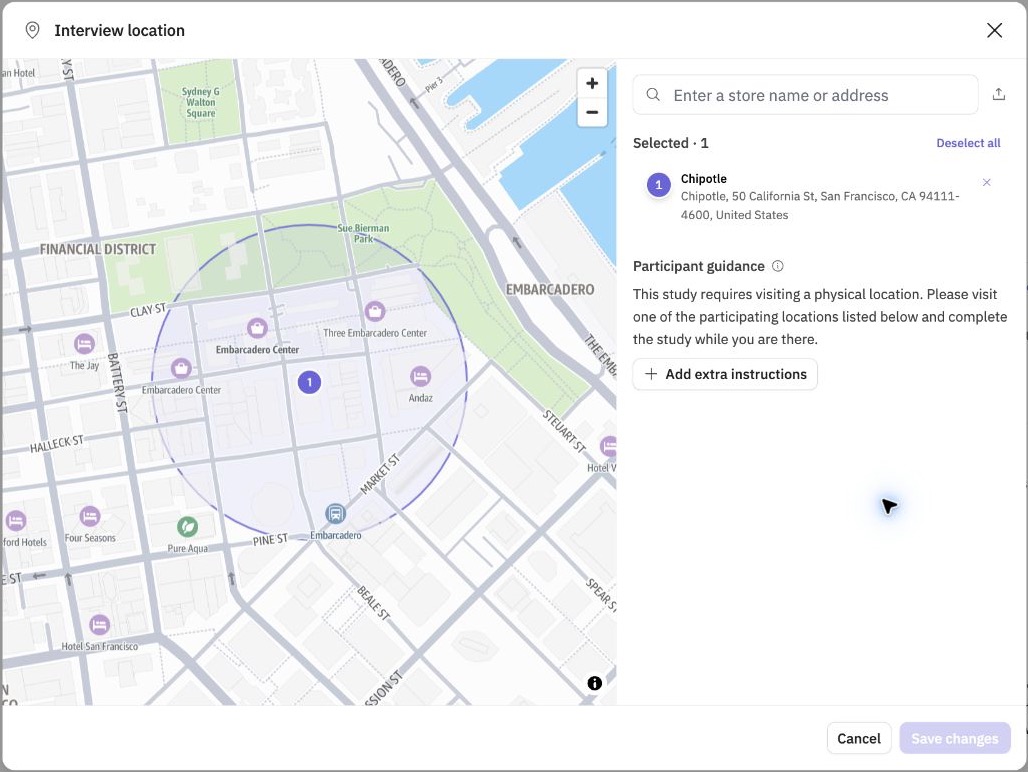
Saving locations enables the location requirement. Clicking Add selected locations alone only updates your unsaved selection.
Prepare Participants
Make the travel requirement clear in your invitation and recruit people who can visit the selected locations. Review your recruitment targeting separately from the saved location list.
To share a QR code with your own audience, open Recruit → Invite your own → QR code and select Download PNG. It opens the same public study link.
Before the interview begins, participants see the location guidance and participating locations. They allow location access, choose a location, and check their arrival. The interview continues after their location is confirmed.
If they’re outside the eligible area, they need to move closer to a participating location and check again.
If location access is denied or the reading is too imprecise, they should enable precise location access for their browser or app and retry.
Review Or Change Locations
Review results: The Location column in Results shows the location recorded when a participant passed the arrival check. A dash means no location match is shown.
Edit locations: Click the location card in your study overview, or open Study settings → Location. Update the selection and save.
Turn off geofencing: Click Turn off location in the overview. This removes the arrival requirement while retaining your saved locations and guidance. The Location column is hidden while geofencing is off.
If you have questions, contact your Outset team at support@outset.ai or via chat.